Tuesday 23 July 2013

A little something I decided to try and make today...


So I can't say this is my own idea...
But, I decided to make something I saw online.
It's pretty easy to do and they make a cute little gift.

What you need:
-Small candle wicks
-Large sea shells
-Candle wax

These were some of the shells I picked up

I saved wax that had similar scents and mixed some unscented candle wax from some tea lights I had, in with the scented wax as well.  That way it isn't too overpowering.

Here's what you need to do:
1. Melt the wax in a microwave safe bowl at 30 second intervals.
2. Once the wax is melted (or some of it is at least - it doesn't need to be entirely melted for this part), pour a tiny blob of wax into the shell, place the wick, and hold in place.  Let it sit and harden for a minute or two.

Here's one of my shells with the wax hardening
3. *You may have to melt the wax more at this point, depending on how much you melted for step #2.*  Pour more wax into the shell until it is filled almost to the top of the shell.  I found that I actually had to pour the wax almost in layers in certain types of shells (I'd pour some wax in, then let it sit.  Once it was almost entirely hardened, I'd pour more wax in, and so on...).  It's also important to note that some shells will want to tip and spill wax out the sides (as I learned...).  So it is possible you'll want the shells leaning into something so that they don't tip over.  You could always use play dough or stick tac.
4. Trim the wick and you're done!

Here are the final candles!  Cute or what?!
This is my favourite candle :)
These are super cute to make from that leftover candle wax and seashells you bring home from trips away!

Enjoy!

A.A.

Monday 15 July 2013

Another Wood Burning Adventure!

So I really like to personalize gifts whenever I get the chance.  Especially when it's for good friends.  So I decided to create another woodburning project for a wedding gift for my friends Katie and Eric.
So I decided to create a little wooden plaque.  Keep in mind this is only the second time I've done woodburning.  But I have to admit, I'm quite content with how it turned out!

All you need to create something like this is: A wood burner (with various interchangeable tips - mine came as a kit (by Walnut Hollow) and I used a 50% off coupon at Michaels to save some $$$), a pencil, eraser, wood, and varnish.

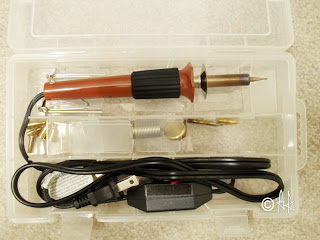
My woodburner kit by Walnut Hollow

I wanted to create something fun, but personalized, so here is what I ended up sketching on the wood:


Now, here are a couple of things I like to remember when I'm woodburning:
  • Take a break every so often (your hands get quite sore!).
  • Always pay close attention to how you are holding the burner.  It doesn't take much for the burner to slip and burn your hand! (not speaking from experience whatsoever.....).
  • Always make sure when it isn't in use that it is turned off, unplugged, and sitting properly in the holder (away from anything else - the last thing you want is for your house to burn down!).
  • Always have a scrap piece of wood handy so that you can brush any ash off, or test any burns/cuts you may want to make.
And here is how the plaque looked as it progressed over time:


*Drum roll please*

Here is the final product! I decided to inscribe the back as well....which took quite a bit longer than I anticipated....along with some extremely sore hands.....
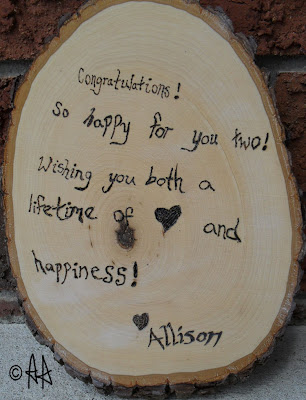
The back of the plaque inscribed

The final product!!!!!! 


Before it was completely finished, I made sure to coat both sides of the plaque in a matte varnish to help preserve it.

I hope Katie and Eric enjoy it!

A.A.

Wednesday 10 July 2013

A couple more nature photos...

So I actually have been creating...slowly but surely since work got out for the summer.
However, I can't post what I've just finished creating until Sunday.  I will explain in the post.

However, because it's so beautiful out (well...at the current moment it is..that could change at any second apparently), here are a couple of nature shots I've taken over the past few years.

Enjoy!

A.A.
Hibiscus plant in the front room of my house
Aruba on the beach
Waterfalls in Aruba